How to share a Knoema page or dataset
A Knoema page can be either public or private. Public pages are available to any user accessing Knoema, even not authenticated users have read access to public pages. Private pages are only available to users you explicitly list. By default, any page that you create is Private.
Follow steps below to make your page publicly available or to share a page with particular Knoema users. First of all, login to Knoema and open a pae you would like to share.
How to make a page public
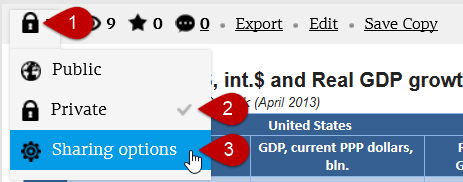
- Click Share button on the toolbar.
- Select Public item from the drop-down menu

How to share a private page and to manage advanced permissions
- Click Share button on the toolbar.
- Check whether the page is Private.
- Click Sharing options item from the drop-down menu.
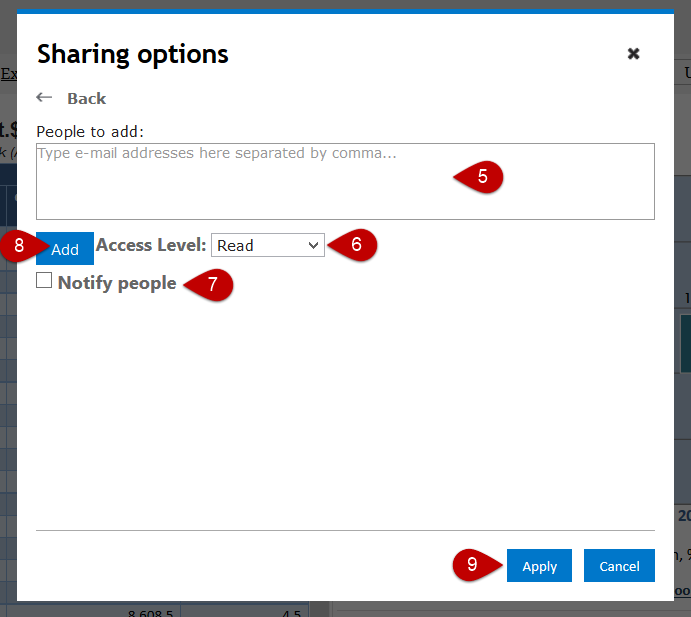
- In the dialog appeared, choose a way you would like to list users. You can explicitly list e-mail addresses or invite your friends from Facebookm Twitter or Google +. For the purpose of this article, we use list of e-meail's.
- Type e-mail addresses separated by comma.
- Specify an access level you would like to grant for listed users. Use Read if you do not want users to be allowed to edit your page; use Edit if you expect users to edit the page content such as a chart appearance and parameterization, page layout, etc. Full control will allow users to change sharing options.
- Set Notify Users checkbox if you would like Knoema to send email notifications to listed users with a direct link to the page.
- Click Add button.
- Click Apply button to make the change effective.
if you decide to change an access level or revoke permissions afterwards, click a corresponding link right under a user name in the Sharing Options dialog, then click Apply.
Related articles